Skip to content

Nilaksha

  • Chat
  • Privacy Policy

Nothing found for 雪梨star的the darling-【✔️推薦DD96·CC✔️】-皇冠足球投注-雪梨star的the darlingmbcnb-【✔️推薦DD96·CC✔️】-皇冠足球投注9qzo-雪梨star的the darlingxz5il-皇冠足球投注lnfc

Sorry, but nothing matched your search terms. Please try again with some different keywords.
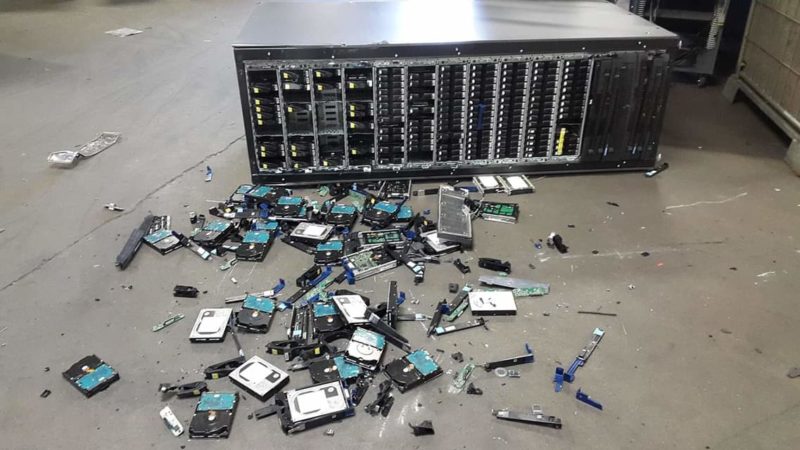
Recent Posts:

One JS code to conquer all forms!

August 21, 2022 by Nilaksha

Javascript is the glue for any web application that connects the UI and the back end, making an application less annoying with unwanted submits and refreshes. This also acts as an agent who handles the message passing in between the front-end and the back-end.

Javascript is cool and all, but too much javascript is not cool. If you remember your first days at computer school, it was one thing your tutors would keep harping on, “Do the job with less code as much as possible!”. Okay fair enough! this usually takes about more than a couple of years for a novice programmer to actually do that. lol. Writing efficient code is not taught, it is learned. And that needs a lot of dedication and hardworking. Something a none techie would “NOT” I repeat “NOT” understand at all.

So recently, I was working on some applications that had to include a massive amount of web forms. and thinking ahead that I have to handle AJAX requests to pass messages to the back-end for all the forms individually, decided to break the norm. After all, there aren’t any rules for coding apart from the house rules your senior asks you to follow.

So let’s get on with it.

/* 
When you see the magic $, you know you need Jquery for this.
I'm demoing this on a laravel framework. If you decide not to CSRF, the following block of ajaxSetup isn't required.
*/
$.ajaxSetup({
    headers: {
        'X-CSRF-TOKEN': $('meta[name="csrf-token"]').attr('content')
    }
});

$(document).ready(function () {
    /*
    This will tap all the form submissions and carry forward.
    */
    $('form').submit(function (e) {
        e.preventDefault();
        var routeData = getRoute(e.target.id);
        if (routeData) {
            var data = new FormData(this);
            ajax(data, routeData['route']);
        } else {
            console.error('Route not defined for this form ID : ' + e.target.id);
        }
    });

    /*
    Have used a swich to define which route to be sent to call at each form 
    ID. For some reason I chose to save parameters in an array and I dont 
    remember why =( . Btw, more the forms, more the cases.
    */
    function getRoute(formId) {
        var data = [];
        switch (formId) {
            case 'frmCreateGaCredentials':
                data['route'] = "ga/analytics-create";
                return data;
            default:
                return false;
        }
    }

    /*
    Ajax call to the back-end. This always sends the form  
    as a JS object. You can do the modifications if you wish to 
    pass data as a serialized form.
    */
    function ajax(formData, route, refresh = false) {
        $.ajax({
            url: base + route,
            type: 'post',
            data: formData,
            processData: false,
            contentType: false,
            success: function (respond) {
                if (respond.success) {
                    // Console the success or propose a toast
                    console.log(respond.data);
                } else {
                    // Not a success, maybe again propose a toast =D
                    alert(respond.data);
                    if (refresh) {
                        location.reload();
                    }
                }
            },
            complete: function () {
            }
        });
    }
});

So as shown this javascript will handle all the form submissions and call the relevant route and get back the responses, will play a great deal saving time for unnecessary ajax request handles.

Password Strength Evaluation using John the Ripper

August 25, 2021 by Nilaksha

Abstract

Choosing the most secure password to safeguard data is crucial to support confidentiality, integrity and availability. Weak passwords are vulnerable due advanced password cracking and evaluation tools.

Password auditing tools such as John the Ripper that comes in Kali Linux operating system can be used to evaluate password strengths using different types of methods in the tool.

Based on demonstrations it is comprehended that passwords which content lengthy, non-dictionary and mixed characters are effective to ensure security with periodical changes.

Keywords

MD5, SHA512, John the Ripper, password file, shadow file, Wordlist mode, Single Crack Mode, Incremental Mode

Introduction

Information security is one of the key areas in application security as it ensures confidentiality, integrity and availability of information to authorized individuals. At present, there are multiple ways of authentication(Eminaǧaoǧlu et al., 2009). Biometrics such as fingerprints, passwords, and pin numbers are a few that stands out. The most commonly used method among these systems are passwords (Ma Y and Feng J, 2011).

With evolution of algorithms and tools, various passwords cracking mechanisms are available at present (Hitaj B et al., 2019). Therefore using weak passwords for authentication becomes vulnerable for data security. Therefore necessity of choosing a strong password is a vital aspect in security

This report demonstrates the evaluation of a few chosen hashed keywords as passwords to comprehend what makes a password strong or comparatively weak based on password cracking methods using John the Ripper password Auditing tool in Kali Linux.

Methodology and Results

Preparation of the virtual environment

  • A virtual computer with Kali Linux installed was prepared (Stephen S et al., 2007).

Kali Linux installation comprises a set of security analysis tools that aids network security analysis tools, pen testing tools and password auditing tools, which assist this demonstration.

Kali Linux Installation Screen
Figure 1 : Kali Linux Installation Screen
  • The user was asked to choose a few options such as the language, the region, network configuration, defining the root password, disk partitioning throughout the installation.
  •  The Kali Linux was started installing after setting up the above requirements.
First Login to Fresh Installation
Figure 2: First Login to Fresh Installation
  • The user was prompted to login after a restart after a successful installation.   
John the Ripper Version
Figure 3 : John the Ripper Version
  • A new terminal was opened and typed the command john to check if the tool John the Ripper is available in the installation.
  • This tool was used to audit the MD5 password hashes.

Creating and Auditing Password Hashes

We have chosen five words with a variation of characteristics to create the MD5 hashes. Hash codes have been stored these in a .txt file named md5hash.txt. The figure below shows the created MD5 hashes for this list of keywords:

  • Password1
  • Fish
  • Ape
  • 999
  • apple01
  • [email protected]#

The current directory have been changed using cd Desktop command.

echo -n “yourText” | md5sum | tr -d ” -” >> md5hash.txt command was used with each phrase that was chosen to hash using MD5.

MD5 Hashes and keywords used
Figure 4 : MD5 Hashes and keywords used

These keywords were picked and were decided based on:

  • Choosing a commonly used word
  • Choosing a dictionary word which the length is less than six characters
  • Dictionary word with digits
  • Text with upper/lower cases of characters with digits and special characters.

Finally, the cat md5hash.txt command was executed to view the content of the file saved the hashes in.

Viewing Hashes via Terminal
Figure 5 : Viewing Hashes via Terminal

Since now we have generated a set of five hashes belonging to the keywords we chose, the command john –format=Raw-MD5 md5hash.txt was executes to start cracking the hashes.We have chosen Raw-MD5 format as we have hashed the words in md5hash.txt using md5 format. Following were the available formats this tool could evaluate.

john –list=formats command was executes to view compatible hash types.

Available formats of John the Ripper
Figure 6 : Available formats of John the Ripper

Once John the Ripper tool was executed on the hashed text file, the tool started evaluating the hashes.

Password Evaluation in progress
Figure 7 : Password Evaluation in progress

The above figure shows how John the Ripper tool processed to decrypt the available hash codes. Within five minutes of time, the tool managed to decrypt the first five keywords and continued to decrypt hash of the complex keyword we created.

The first five keywords we defined consisted of dictionary words, pure digits or a mix of both which were decrypted faster.

Linux User Account Password Evaluation

For this demonstration we started off by creating three user accounts with passwords of different caliber for each account. Below is a list down of the account name and with the password used.

Table 1 : User Account Passwords

Username Password
user1 user1
user2 nilaksha
user3 #[email protected]#
  • A keyword which is a mix of dictionary word and digit is chosen as the password of the account uesr1
  • A keyword which is not a dictionary word is used for the account user2
  • A keyword which is a combination of mixed case and digits with special characters is chosen for the account user3.

Below figures demonstrate how accounts were created in Kali Linux.

Creating New Users in Kali Linux
Figure 8 : Creating New Users in Kali Linux

User account details are stored in mainly two files in the Kali Linux operating system. /etc/passwd keeps data about user accounts and /etc/shadow file keep actual passwords in an encrypted format. To view the content of these files, execute cat /etc/passwd and cat/etc/shadow commands.

passwd file Stores User Account Details
Figure 9 : passwd file Stores User Account Details

The above figure shows the default root account and the lastly created user accounts squared in red. This is included as a string which the parameters are separated by a colon ( : ) symbol. Following are some essentials parameters which are good to know for the demonstration.

user3:x:1002:1002:,,,:/home/user3:/bin/bash

user3 – User login name

x – If encrypted password is stored in the shadow file

1002 – User ID

1002 – Group ID

/home/user3 – Home Directory

shadow file that Stores Encrypted data
Figure 10 : shadow file that Stores Encrypted data

The shadow file as well maintains a similar format as the passwd file to store data. The squared sections from the above figure shows the encrypted passwords along with some more additional data as following

user1:$6$xQq.v4EvhS/QfBjC$TJfD9BKDmRy93.Yq5FX/h614vMLoqE5tIL42ZeFEtJGltiNW49ve2A9pWihR08FC0/C4XEKT8B8N5orTfcUnZ/:18614:0:99999:7:::

user1 – User name used to login to the system

$6$xQq.v4EvhS/QfBjC$TJfD9BKDmRy93.Yq5FX/h614vMLoqE5tIL42ZeFEtJGltiNW49ve2A9pWihR08FC0/C4XEKT8B8N5orTfcUnZ/ – $6 stands for the encryption type the following hash has been created by. In this case the encrypted algorithm is SHA-512. The following string with the $ sign is the encrypted password.

To proceed with solving the user account hashes we have made copies of passwd file and shadow file on the desktop. The following commands were executed to achieve this.

cd Desktop – To navigate to the desktop

cp /etc/passwd passwd.txt – Copy passwd file on the current directory to passwd.txt file

cp /etc/shadow shadow.txt –  Copy shadow file on the current directory to shadow.txt file

The above created copies of the files. We need to combine usernames with password details these copied files before proceeding with the password cracking. This is achieved by the following command

unshadow passwd.txt shadow.txt > passwords.txt

The following command was executes to view the product in the passwords.txt of the previous command.

cat passwords.txt

unshadowing shadow and passwd files
Figure 11 : unshadowing shadow and passwd files

We proceeded with the password cracking with the tool John the Ripper, after we collected information of the hash type of the hash code created by the operating system, we chose a compatible format in John the Ripper tool to proceed with cracking.

The following command was executed to start the tool. john –format=sha512crypt passwords.txt

This started evaluating and de-hashing the hashed values from the un-shadowed file we created previously.

John the Ripper operating on the un-shadowed file
Figure 12: John the Ripper operating on the un-shadowed file

A few considerable amount of hours later, we can check the results of the password on how the tool is progressing.

Also note that the tool has escalated the password cracking rules from Single to Incremental ASCII. Simple passwords such as dictionary words may be able to crack using Single rule. To solve complex passwords, the tool may have to escalate its rules to higher algorithms.

We can check the progress of the operation by executing the following command

john –show passwords.txt Following is how the cracked passwords will display

Cracked passwords
Figure 13 : Cracked passwords

Note that the passwords for the default account root, and user1 are being revealed, which were root and user1. Event after 16 hours of time, the non-dictionary and complex password values were still being evaluated by the tool.

Different Cracking Modes of John the Ripper

John the Ripper tool has four main methods, each method has ups and downs based on the requirement.

  • Wordlist Mode

This cracking mode allow to define your own words list (Hanawal & Sundaresan, 2010). John the Ripper will run through the list of passwords, generate the hash and will compare with the currently provided hash code to determine the matching password. This method also enable mangling rules to be applied for each line of the word list to produce multiple candidate password from each word.

Create a new hash value for any word you need and save it to a text file as below. And view the hash by the cat md5.txt command.

echo -n “nilaksha” | md5sum | tr -d ” -” >> md5.txt

Create MD5 hash value for given name
Figure 14 : Create MD5 hash value for given name

Once the hash is created, create a text file called john.txt and include a set of random words, one per line including the word ‘nilaksha’, the one you hashed in the md5.txt file.

Wordlist
Figure 15 : Wordlist

Now execute the following command to use the defined dictionary to resolve hash for the word ‘nilaksha’ using below command. We additionally adds the word list to be checked across with the hash text.

john –format=Raw-MD5  md5.txt -wordlist=”john.txt”

Once executed, execute the below code to view the password for the hash value

john –show –format=Raw-MD5 md5.txt

Cracked password using wordlist
Figure 16 : Cracked password using wordlist
  • Single Crack Mode

This method gathers and uses usernames, name fields from users home directory as candidate passwords with mangling rules applied (Hanawal & Sundaresan, 2010).

In order for John to crack a password, it needs to gather information about the user. This can be prepared by creating an unshadow file with the combination of passwd and shadow files in the /etc/ directory. Following are the steps to proceed with the single crack mode.

We start by adding a new user with following details. Execute command

adduser kalpa –  This will create a new user called kalpa

Table 2 : New user credentials

Username Password
kalpa kalpa1

As demonstrated previously in this documentation, it is required to unshadow passwd file and shadow file. Navigate to the desktop by executing cd /Desktop and execute unshadow /etc/passwd /etc/shadow passwords.txt command to create the shadow file in the desktop. View the file by executing cat passwords.txt.

Creating User for Single Crack Mode Demonstration
Figure 17: Creating User for Single Crack Mode Demonstration

We can now execute John the Ripper tool to crack the password for the created user. Execute the following command to run the tool.

John –format=sha512crypt –single passwords.txt – Will run John the Ripper in single crack mode

John –show password.txt – Will show the cracked password.

Cracked Password via Sigle Crack Mode
Figure 18 : Cracked Password via Sigle Crack Mode
  • Incremental Mode

This tries all the possible combinations of passwords based on ASCII, LM_ASCII, uppercase, lowercase…etc (Hanawal & Sundaresan, 2010). Usually this mode may never terminate because of the large combination of keys generated. However this can be limited by defining a length of characters for the cracking password.

Let’s demonstrate this mode by creating an md5 hash for a simple text as below. Bellow will create a hash code for the word ‘pear’ and save inside the md5.txt file. You may view the content using the command cat md5.txt

echo -n “peach” | md5sum | tr -d ” -” >> md5.txt

Preparing the hash for Incremental Evaluation
Figure 19 :  Preparing the hash for Incremental Evaluation

We can now execute John the Ripper in incremental mode using the below code. We are passing the flag incremental to define the mode of execution of John the Ripper

john –format=Raw-MD5  –incremental md5.txt

Cracking Password using Incremental Mode
Figure 20 : Cracking Password using Incremental Mode

Conclusion

The strength of a password can be determined by using evaluation tools such as John the Ripper. These password evaluation tools are built to reveal frequently used passwords, passwords based on user account details such as names, contact numbers and other details, dictionary words, pure digits based passcodes as well as dictionary words combined with simple digits.

Password audit tools are also able to crack complicated passwords based on all the possible digit, character combinations. That will take a vast amount of time to audit such passwords.

Re-using a previously used password also can also attract vulnerabilities since the hash may have been already obtained by third party persons and been evaluated.

Based on the results of the above demonstration a good password policy for an organization should include below properties.

  • Minimum password length

According to statistics most common passwords length is 8 which would have been enough a decade ago.  According the passwords cracking mechanisms available, password minimum length must be at least ten characters (Hanawal & Sundaresan, 2010).

  • Password Re-use

A use may not re-use a password that have been used before. Because the hash value for the particular password may have been already obtained before and revealed. So re-using the same password may be risky (Baily DV et al., 2014).

  • Character Combination

The character combination of the password may contain mixed upper and lower alphabetical characters, including numbers and special characters. This will make it complicated and consume a very large amount of time and computational power for password crackers to reveal the password. It is very unlikely such a password maybe revealed (Hanawal & Sundaresan, 2010).

  • Use of dictionary words

The user may not use words that can be easily guessed or dictionary words or pure digits. These types of passwords may be easily revealed by password cracking tools (Hanawal & Sundaresan, 2010).

Therefore it is ideal to use passwords that are lengthier than eight characters and change them periodically with an equal strength password.   

References

  1. Eminaǧaoǧlu, M., Uçar, E., & Eren, Ş. (2009). The positive outcomes of information security awareness training in companies – A case study. Information Security Technical Report, 14(4), 223–229. https://doi.org/10.1016/j.istr.2010.05.002
  • Hanawal, M. K., & Sundaresan, R. (2010). Advanced Research in Mathematical. Electrical Communication, February.
  • Hitaj B., Gasti P., Ateniese G., Perez-Cruz F. (2019) PassGAN: A Deep Learning Approach for Password Guessing. In: Deng R., Gauthier-Umaña V., Ochoa M., Yung M. (eds) Applied Cryptography and Network Security. ACNS 2019. Lecture Notes in Computer Science, vol 11464. Springer, Cham. https://doi.org/10.1007/978-3-030-21568-2_11
  • Stephen Soltesz, Herbert Pötzl, Marc E. Fiuczynski, Andy Bavier, and Larry Peterson. 2007. Container-based operating system virtualization: a scalable, high-performance alternative to hypervisors. In Proceedings of the 2nd ACM SIGOPS/EuroSys European Conference on Computer Systems 2007 (EuroSys ’07). Association for Computing Machinery, New York, NY, USA, 275–287. DOI:https://doi.org/10.1145/1272996.1273025
  • Y. Ma and J. Feng, “Evaluating Usability of Three Authentication Methods in Web-Based Application,” 2011 Ninth International Conference on Software Engineering Research, Management and Applications, Baltimore, MD, 2011, pp. 81-88, doi: 10.1109/SERA.2011.18.

Memory Forensics using Volatility

June 28, 2020 by Nilaksha

There comes times when forensics experts have to investigate an incident and look at different areas in an affected device. One of the key areas to look at in an investigation is the memory of a live system or the current state of the computer when the device faces the incident .

The specialists base their investigations oriented two key findings in the affected system. One is the memory dump and the hibernation file in the device.

This is a basic demonstration of how we can get started on with, extract and do algorithmic searches for evidence in an affected state of the device.

What is hiberfil.sys and how we extract it for further analysis

The hiberfil.sys file is being created before the computer goes into hibernation mode. The purpose of the hiberfil.sys file is to regain the previous state of the computer before it activated the hibernation mode. This state contains the processes that were running before hibernation mode, work in progress in the application ..etc. 

Users can locate the hiberfil.sys file in the root directory of the local disk drive. In general case it is located in “C:\hiberfil.sys”. And this is also a hidden system file which you can make visible by showing the system hidden files in view settings as below.

In case you do not have hibernation mode enabled in your computer, this file may not be available.

Creating the hiberfil.sys file

  1. Run command prompt as administrator.
  2. Execute powercfg -h on command to create the hiberfil.sys file.
  3. Execute powercfg -h off command to delete the existing hiberfil.sys file.

Copying the hiberfil.sys file to a different location

Since the hiberfil.sys file is locked from being copied or modified externally by the system because it is always being accessed by the system, you may not be able to simply do a CTRL+C and a CTRL+V on this file on a live system.

There are a set of tools that can be used to copy files being used by another process. Following are a few listed

  • ShadowCopy
  • HoboCopy
  • ShadowSpawn
  • Passmark OSForensics
  • PC Hunter
  • Extents
  • Raw Copy
  • PsExec 
  • FTK Imager
  • WinHex
  • Manual extraction

Option 1

The weapon of my choice for this piece of battle will be WinHex. 

Click on Tools -> Open Disk  and the following window will open to select the drive you want to extract files from. 

This will take you to a screen that will list down your files in the drive.

Now we need to write-click on the hiberfil.sys file and click on the Recovery/Copy  button. Choose a location and get a backup of this file.

Option 2

If you have a bootable pen drive, you could also boot your computer using the bootable device and simply get the hiberfil.sys file copied into another device.

Reading the hiberfil.sys file

To read the hiberfil.sys file, we are going to use another tool. Volatility is a memory forensics framework for incident response and malware analysis. There are few steps to prepare your hiberfil.sys file before we can actually read data out of it. 

  • Get information, OS version of the computer which we obtained the hiberfil.sys file. 
  • Convert the hiberfil.sys file into a raw format for the Volatility application to read data.

Getting the operating system version is important since this is useful when choosing a profile to convert data in the volatility application. Following is a reference table to look at when using volatility to convert your file to a raw format. 

Based on the operating system you have, you can pick up the profile version you need to use to convert the file. Execute the below command to convert your file.

imagecopy -f hiberfil.sys -O hiber1.raw –profile=Win7SP1x86_23418

Following is how volatility will process the command.

Once the above steps are done. The hiberfil.sys file is ready for investigation. You can execute some of the commands to view the data inside as the following. 

  • Identifying the system profile -f hiber.raw imageinfo
  • Getting a list of processes -f hiber.raw –profile=Win7SP1x86_23418 pslist . In this instance, you need to specify the profile within the command. 
  • Finding suspicious Injected code and dump sections 

malfind -f 7/hiber.raw ./7/mal –profile=Win7SP1x86_23418

  • Listing available registry hive -f 7/hiber.raw hivelist  –profile=Win7SP1x86_23418
  • Open DLL functions  -f 7/hiber.raw apihooks   –profile=Win7SP1x86_23418

hiberfiil.sys reveals the list of processes, registry hive, memory sections with suspicious alterations, invoked API functions in the system. the system profile and flavor and much more. With the aid of a separate tool, you will be able to extract this file in a live system and get started with the investigation.

How can your website survive a pandemic traffic attack

March 30, 2020 by Nilaksha

Everybody loves a website that has a good amount of traffic and engagement. Increasing traffic is a good indication that your website has good value to your visitors and it has quality content. Well, to get there you need to think about user experience, how you place your content within, color distribution, and how SEO friendly your website is and whatnot. While you are positively dealing with these problems, it is very likely your website will draw more attention and traffic. Viral content or special occasions are very likely to create high spikes in your user visits routines for your website.

This is a good thing for you and your business. But also this is where you need to start making arrangements to handle a sudden high volume of traffic to your website. Ignoring this fact is where your audience will start losing faith in your website due to just a handful of reasons.

Your website will start ill-performing

High traffic means, you need to have a higher bandwidth in your webserver to allow all the concurrent users to freely roam in your website. Not having enough bandwidth will create congestions for users and what comes to our mind with this word?   Yes. Traffic jams. Users will experience slowness in your website and this will no longer be a leisure ride for the users.

Your website will not be available to the extra users or overall everyone

Unavailability is the worst-case scenario that your website can go through with a lack of bandwidth. This will cost your site visitors and their faith in your website. This will reduce re-visits to your website by new visitors. And your website will start rolling tumbleweeds in a very short amount of time.

How do you survive pandemic traffic attacks?

While this isn’t much of a big problem to overcome, website owners can take some immediate precautions to handle these situations.

Minimize Content On-The-Fly

Most of the website build platforms operate on the content on-the-fly principle which adds continuous work to the servers every time a web page is requested by a user. The increasing processes to a server is another way a website will ill-perform due to a lack of extra processing power to allocate over the available resources.

Server caching is an easy solution to overcome this problem. These will cache pre-built web pages for a short period of time and will show the users a cached version of the website.  Reducing the need for processing power to load a web page brand new each time.  One downside of this technique is, changes to the website may not reflect immediately to the users until the cached old version of the webpage expires.

Content delivery from the closest

Using a content delivery network or a CDN will pay you off a lot if you have a bunch of static resources. The CDN  will eliminate the need of your server from loading the resources, rather the CDN will load all the resources from a closer server to the website visitor. This will free up the processing load from the application hosting server and distribute work within the CDN servers.

Getting a better server

Opting in with a hosting service that is flexible supplying resources on demand can be a permanent solution for this type of a requirement. In this scenario, a VPS managed or unmanaged is more preferable than a shared hosting service.

Amazon and Google are a couple of provides that have costing plans based on the processing power used by your website. Cost-wise these services might be overbudgeted for a basic website.

Use of load balancers

Load balancers are physical or virtual devices that efficiently distribute network traffic across a number of servers in a clustered server farm. With load balancers, we are able to monitor traffic and redirect users to alternative server nodes based on user country, current traffic status and down/up status of one or multiple servers. Adding load balancers benefits you in a lot more ways than handling traffic to your website.

This is comparatively a more expensive solution when compared with other solutions discussed in this article.

Virtual Waiting Rooms 

While all the above tactics are oriented on serving all the concurrent visitors of your website, the virtual waiting rooms take on a different approach. These are built to detect abnormal traffic increases against the available resources of your hosting server and puts the extra users in a queue and will be shown a waiting page.

By keeping the users on a waiting page, virtual rooms try to achieve two tasks. One is to avoid the server from crashing due to resource exhaustion and the other,  directing the next in queue user to the actual website when resources get free.  This option might not be everyone’s cup of tea as the waiting time for a user is not that predictable.

Conclusion

With advanced innovations available, maintaining website availability and smooth running is not your biggest thing to worry about in this era. Users can just settle for one solution or a combination of solutions to retain availability based on a customer’s requirements and the budget.

A lesson learnt, the right way.

February 12, 2020 by Nilaksha

This is one of those topics that we used to talk and write about when we were kids. We read books and stuff for the sake of doing but really didn’t know why we do this.

As a growing being who is trying to make it to the “Top” you should start reading. This is what people in the “Top” keeps telling us on a daily basis. Sometimes we don’t get it. We think “Ah we get things done. We find the solutions for what’s given”. True, but for a limited extent. With this attitude, chances you may get owned by someone who reads a lot is very likely. Because at a point in life, you have to accept the fact that only the practical knowledge

might not do the trick anymore. You need to be theoretical for most of the cases. Proven theory helps to do things better than finding a whole new wheel sometimes.

This is about an experience I got from one of my good seniors where I worked. A simple thing but this got me starting to think in a whole different way on certain things.

One day my senior talked to me asking about launching an application built by me. One common thing we have to do when we build a new product is that, we have to name it. This question was asked from me with a suggestion which was already brought to the thinking table. Without asking and questions, I was hesitant using that name (mistake 1, mistake 2). This hasn’t been something I took serious at all by the time this was asked. Gave a random thought about it and gave some ideas.

The other day morning, some good name that I thought that might be good popped into my head I immediately sent to the boss. His only reply was “This name is boring. Anyone can call an application this.”, then I replied, at least it is better than what you said in a cheery manner (mistake 4 – but this is where I learnt it all). The reply I got for this was a very interesting one, which changed the ways of my thinking about a lot of things.

It started with an explanation of why this name was selected and how this name is connected with my actual application, which made a lot of sense regardless how funny I thought the suggested name was.

Then he continued, “Being cynical doesn’t help anyone my friend. WTF does google mean ? The term google itself is a creative spelling of googol, a number equal to 10 to the 100th power, or more colloquially, an unfathomable number. Googol was coined in the 1930s and is attributed to the nine-year-old nephew of American mathematician Edward Kasner.”

This is where I realized how a simple word could enhance and give a strong meaning to a product. And how a name can add a value to a product. This is a pretty basic story, but this is one of those simple incidents that we could have hit a homerun if we get it right.

Who knows? Maybe one day I get my sh*t done right and it gets me a fortune. Fingers crossed 🙂

So. What to learn here?

Always question why and how – Being curious will give you the drive to explore new things.

Always try to read  – Perhaps you will learn something new that you thought you knew already, but you really didn’t.

Do not ignore small stuff – Big things cannot be done right if you haven’t done small things right.

Maturity comes with reading – Be a regular reader, hungry for new knowledge. The knowledge doesn’t always have to be your job domain.

And lastly,

Always get the name right

Nilaksha Perera


[email protected]

I am a full-stack PHP developer who loves facing challenges and leaning into diversed technologies.
I am #passionate #learner #leader #mentor #lovewhatido.
I love #coding #cybersecurity #mycommunity

Recent Posts

  • One JS code to conquer all forms!
  • Password Strength Evaluation using John the Ripper
  • Memory Forensics using Volatility
  • How can your website survive a pandemic traffic attack
  • A lesson learnt, the right way.

Archives

  • August 2022
  • August 2021
  • June 2020
  • March 2020
  • February 2020
  • January 2020
  • December 2019
© 2023 Nilaksha